Knowledge base intergration using QnA Maker
 October 15, 2020
Here you will find how to intergrate a knowledge base to your bot to be able to answer questions parsed from an external source. Additionally give it the ability to answer some commonly used questions using preset or custom answers.
QnA Maker is a cloud-based API service, part of Azure Cognitive Services, that lets you create a conversational question-and-answer layer over your existing data. It gives you the ability to build knowledge bases and extract questions and answers to incorporate in your bot.
Chit-chat is what became from Personality Chat NuGet package. It enables you to intergrate small talk into your bot to answer comonly used user questions. It is now available through QnA Maker and you can use it just like any other knowledge base.
Create
At first, head over to https://www.qnamaker.ai/ and Sign In to create QnA Maker model. Click Create a knowledge base to get to the creation page.
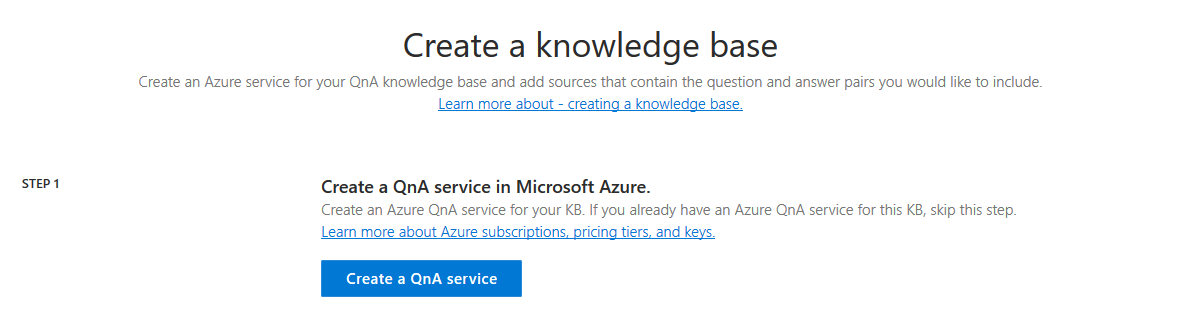
Follow STEP 1 and click the Create a QnA service button. This should open Azure Portal with the QnA Maker form ready to bee filled in.
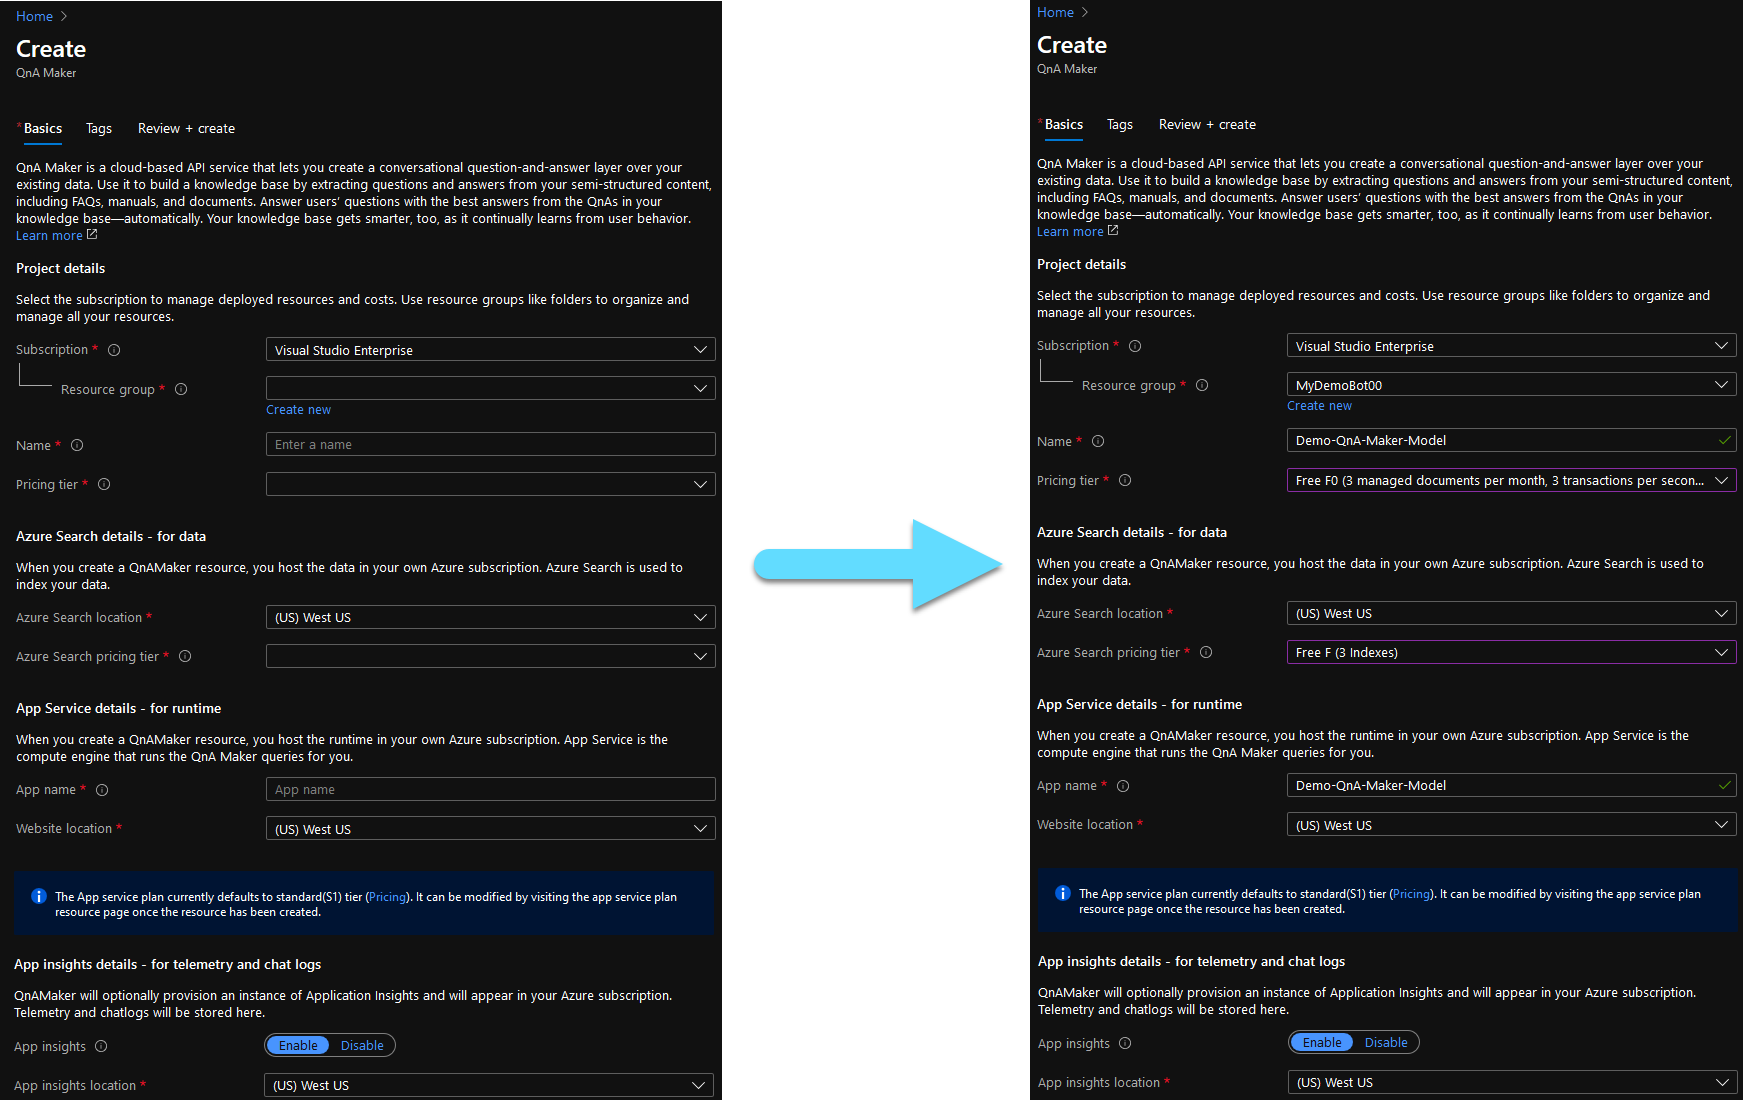
Only the fields with the ‘*’ are mandatory.
- The Subscription field is populated by default with your default azure subscription.
- Resource Group is the group that will contain the resources you are creating now. You can either create a new one, ore use an existing one.
- Name is the name of your QnA service, as well as your domain endpoint. Find one that is available.
- For now you can choose a Free F0 Pricing tier and you can increase it later according to your needs.
- Azure Search location is occupied by default, but you can change it if you want something closer to you.
- You can choose Free F for Azure Search pricing tier and you can increase it later if your needs exceed it.
- App name is the name of your App service, and is occupied by default using your selected Name. you can change it if you like.
- Website Location can be changed for something closer to your area, although is not mandatory to do so.
- App insights enables your bot’s Analytics on Azure. It is on by default, but you can turn it off if you do not require access to Analytics.
- App insights location can also be changed to another area, but is fine as is.
After you complete everithing it should look like the picture bellow.
Click the Review + create button to get to the last tab. Check that everithing is correct and click Create.
Now deploymen id in progress and you might need to wait a few minutes. Once deployment is complete you will get a notification and a message will also appear on your screen.
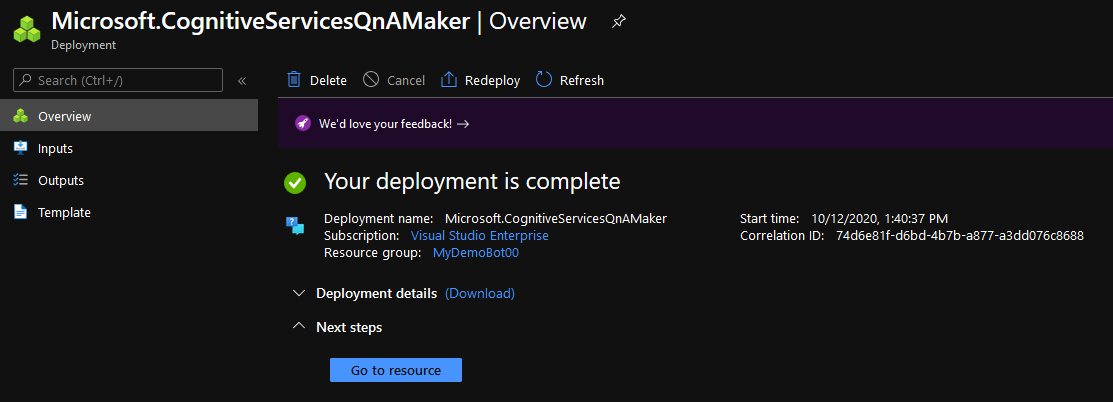
You can click Go to resource to navigate to the resource you just created. You do not need to take any further actions here, as the service has already been created. You can return to QnA Maker and continue with STEP 2.
Connect
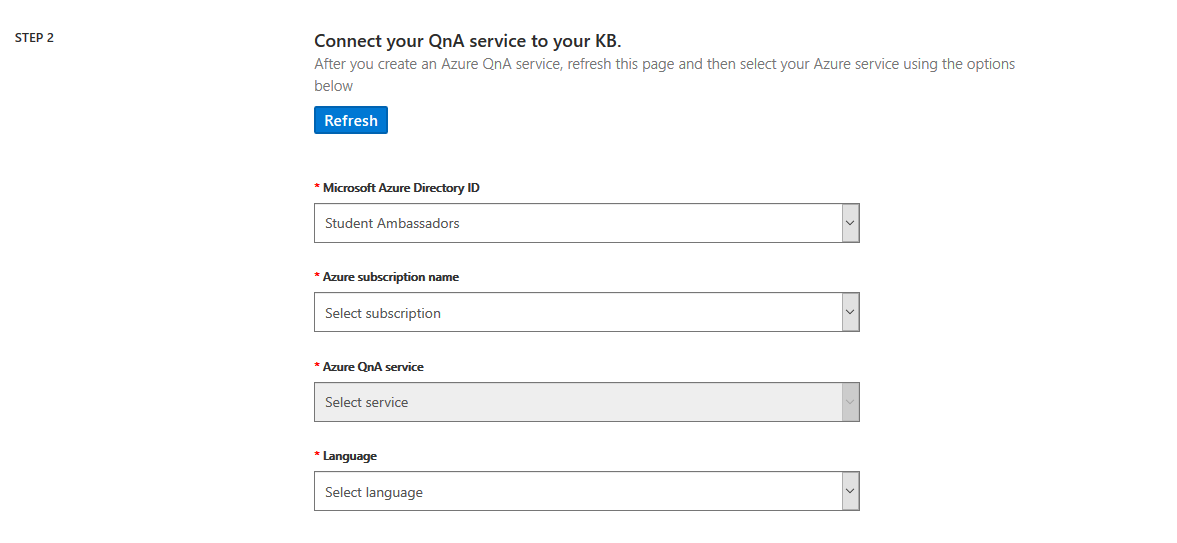
Here you can connect the service you just created to your Knowledge Base.
- In Microsoft Azure Directory ID you select your tenant. It might be already selected for you.
- In Azure subscription name just put the same subscription you used to create the QnA Maker service.
- Azure QnA service choose the name of the service you created.
- For Language you should choose the language that your knowledge base uses. Not all languages are supported by Chit-chat however and it might only be available for data extraction. For this example we will be using English which are also Chit-Chat supported.
Proceed to STEP 3 to pick a name for your knowledge base.

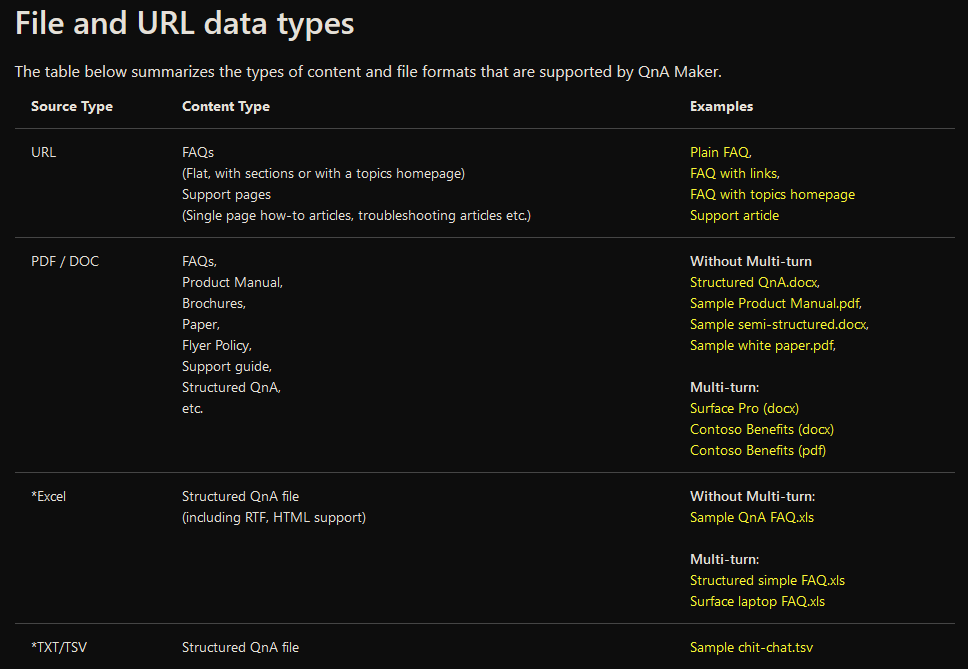
In STEP 4 you need to populate your knowledge base. You can extract questions and answers from a website, and fill in the provided URL and you can also upload questions and answers as files. You can find the supported data types here and also in the picture bellow.
- You can check the checkbox to enable multi-turn conversation which will drive your bot develop a dialog with the user in order to answer a question. You can leave it unchecked for now.
- In the URL we will use this url: https://www.microsoft.com/en-us/software-download/faq which provides some Frequently Asked Questions about Microsoft products. You can replace it with any other question-and-answer formated source you like and you can also add more than one source.
- If you wish to upload a file, you can click Add file in the File name field.
- Chit-chat is the module that will handle small-talk for your bot. Pick a personalty for your bot, if you do not want this module to be included in your knowledge base, just pick None. We eill be using Friendly for this example.
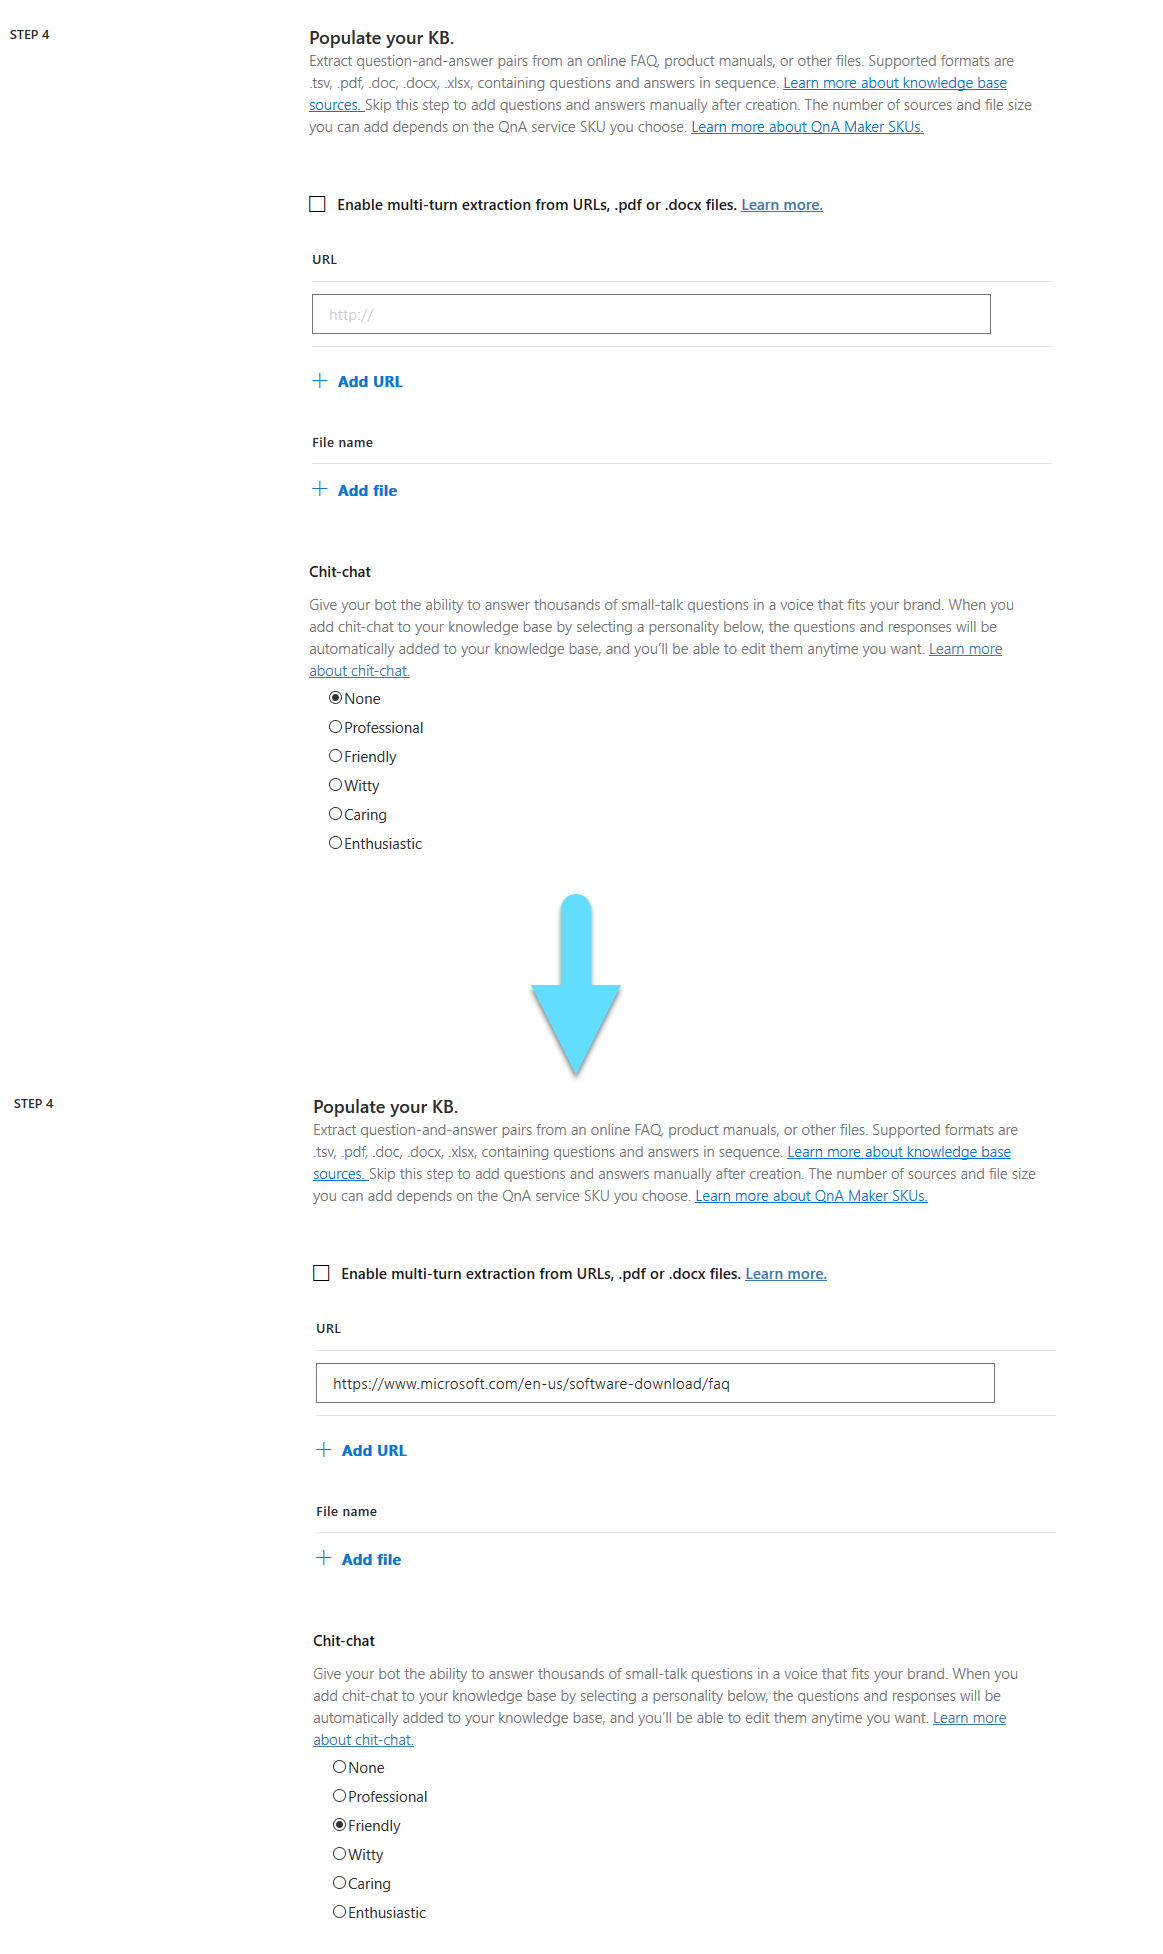
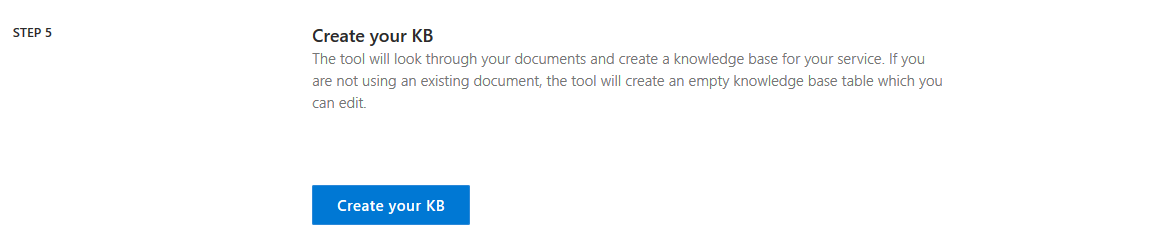
Lastly at STEP 5 click Create your KB to complete the creation of your knowledge base.
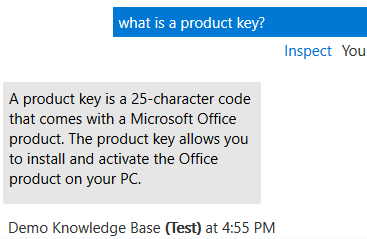
You might need to wait a few minutes for all the sources to get parsed. After is done you will see all the questions and answers, from all the sources that your knowledge base contains. You can edit the questions and the answers, add alternate phrasing for the questions, follow up prompts for the answers, or even add more questions. When you make all the changes you want click Save and train at the upper right corner of the window. Then you can click Test to ensure that everything is working right and ask away, like in the picture bellow.
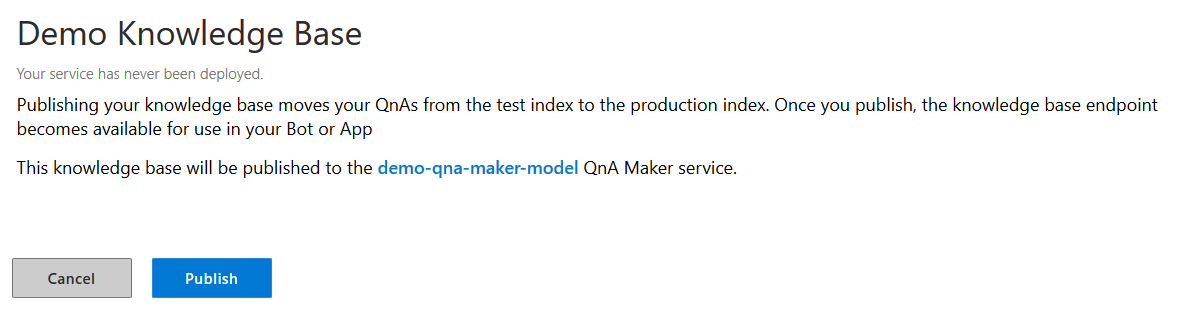
If everithing is working as expected, proceed by clicking on the PUBLISH tab.
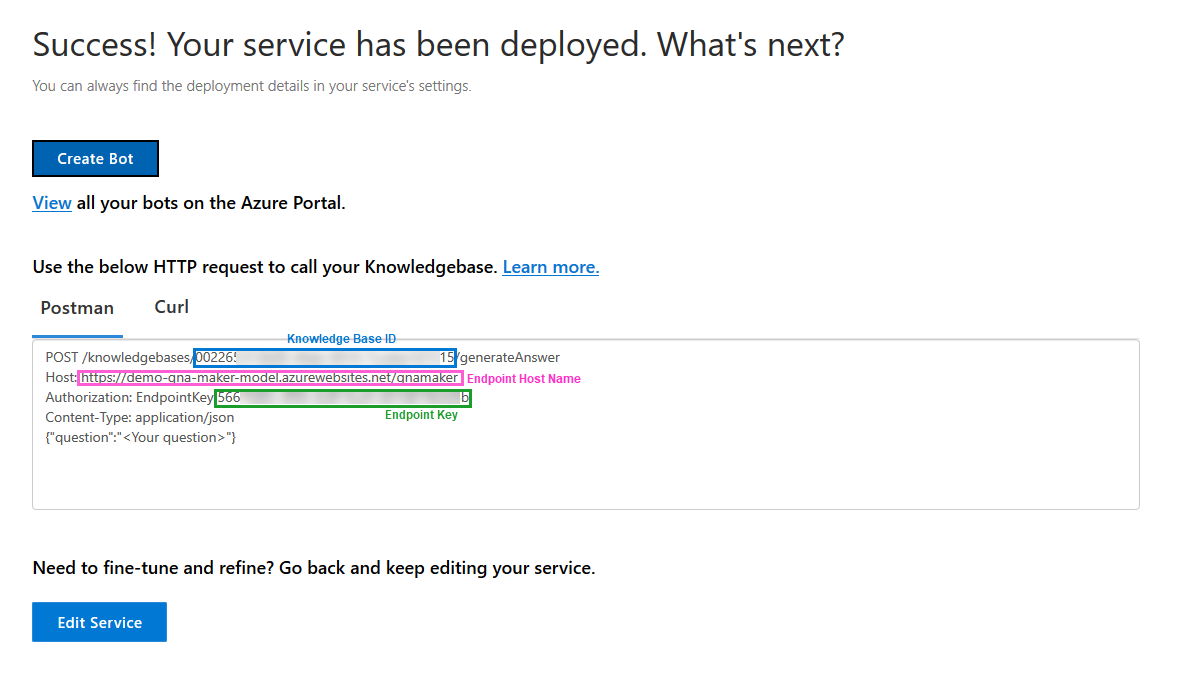
After it is published, you will see some usefull information about your knowledge base. Save your Knowledge Base ID, Endpoint Hostname and Endpoint Key for later use. To find them follow the picture bellow.
If you want to create a new bot, click Create Bot.
If you already have a bot and want to connect your knowledge base with it, continue with the implementation section.
Implement
We will be using a newly created Core Bot with source code donloaded from Azure. You can also find the source code in the GitHub Samples. If you are using the same, be sure to comment out MicrosoftAppId and MicrosoftAppPassword from the appsettings.json file, in order for the bot to run in the emulator. This bot has some functionality already build in, as well as a connection with LUIS Services. We will be sending a request to our knowledge base only if luis does not return with a build in intent.
Open your bot using Visual Studio, go to Project -> Manage NuGet Packages and install the Microsoft.Bot.Builder.AI.QnA package. You might need to update your existing packages before installing it.
In the FlightBookingRecognizer.cs add a using for the newly downloaded package. Put your Knowledge Base ID, Endpoint Key and Endpoint HostName as strings. Create a QnAMaker variable and inside FlightBookingRecognizer(IConfiguration configuration) populate the values for your variable. Your code should look like this.
FlightBookingRecognizer.cs
using System.Threading;
using System.Threading.Tasks;
using Microsoft.Bot.Builder;
using Microsoft.Bot.Builder.AI.Luis;
using Microsoft.Extensions.Configuration;
using Microsoft.Bot.Builder.AI.QnA;

namespace Microsoft.BotBuilderSamples
{
    public class FlightBookingRecognizer : IRecognizer
    {
        private string QnAKnowledgebaseId = "00226KnowledgeBaseID15";
        private string QnAEndpointKey = "566EndpointKeyb";
        private string QnAEndpointHostName = "https://demo-qna-maker-model.azurewebsites.net/qnamaker";

        private readonly LuisRecognizer _recognizer;

        public FlightBookingRecognizer(IConfiguration configuration)
        {
            var luisIsConfigured = !string.IsNullOrEmpty(configuration["LuisAppId"]) && !string.IsNullOrEmpty(configuration["LuisAPIKey"]) && !string.IsNullOrEmpty(configuration["LuisAPIHostName"]);
            if (luisIsConfigured)
            {
                var luisApplication = new LuisApplication(
                    configuration["LuisAppId"],
                    configuration["LuisAPIKey"],
                    "https://" + configuration["LuisAPIHostName"]);
                // Set the recognizer options depending on which endpoint version you want to use.
                // More details can be found in https://docs.microsoft.com/en-gb/azure/cognitive-services/luis/luis-migration-api-v3
                var recognizerOptions = new LuisRecognizerOptionsV3(luisApplication)
                {
                    PredictionOptions = new Bot.Builder.AI.LuisV3.LuisPredictionOptions
                    {
                        IncludeInstanceData = true,
                    }
                };

                _recognizer = new LuisRecognizer(recognizerOptions);
            }

            SampleQnA = new QnAMaker(new QnAMakerEndpoint
            {
                KnowledgeBaseId = QnAKnowledgebaseId,
                EndpointKey = QnAEndpointKey,
                Host = QnAEndpointHostName
            });
        }

        // Returns true if luis is configured in the appsettings.json and initialized.
        public virtual bool IsConfigured => _recognizer != null;

        public virtual async Task<RecognizerResult> RecognizeAsync(ITurnContext turnContext, CancellationToken cancellationToken)
            => await _recognizer.RecognizeAsync(turnContext, cancellationToken);

        public virtual async Task<T> RecognizeAsync<T>(ITurnContext turnContext, CancellationToken cancellationToken)
            where T : IRecognizerConvert, new()
            => await _recognizer.RecognizeAsync<T>(turnContext, cancellationToken);

        public QnAMaker SampleQnA { get; private set; }
    }
}
In the MainDialog.cs change the default step of the intent switch to the following code.
default:
    // Catch all for unhandled intents
    // Try to find an answer on the knowledge base
    var knowledgeBaseResult = await _luisRecognizer.SampleQnA.GetAnswersAsync(stepContext.Context);

    if (knowledgeBaseResult?.FirstOrDefault() != null)
        return await stepContext.ReplaceDialogAsync(InitialDialogId, knowledgeBaseResult[0].Answer, cancellationToken);
    else
    {
        // If it's not on the knowledge base, return error message
        var didntUnderstandMessageText = $"Sorry, I didn't get that. Please try asking in a different way (intent was {luisResult.TopIntent().intent})";
        var didntUnderstandMessage = MessageFactory.Text(didntUnderstandMessageText, didntUnderstandMessageText, InputHints.IgnoringInput);
        await stepContext.Context.SendActivityAsync(didntUnderstandMessage, cancellationToken);
    }
    break;
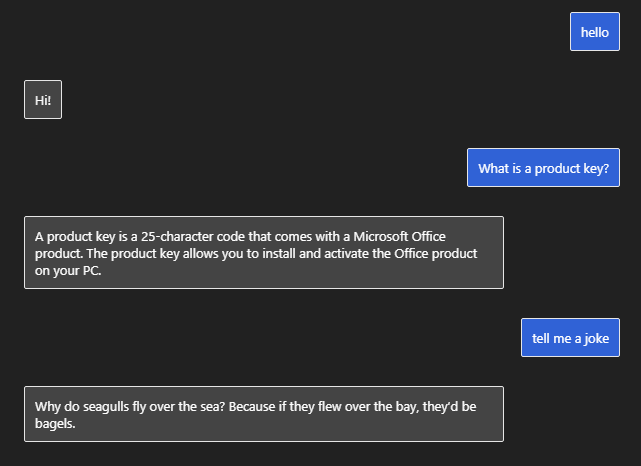
You have successfully implemented the knowledge base into your bot. You can test it using the emulator. It should be able to chit-chat and answer questions listed in the Microsoft FAQ page. Here is an example.
You can make any changes you wish to the knowledge base, or even add new sources, and it will immediately reflect those changes to your bot, without changing any code.