Introduction to Computer Vision using Azure
 February 02, 2021
Computer Vision is an AI Service part of the Azure Cognitive Services that analyzes content in images and video.
Create
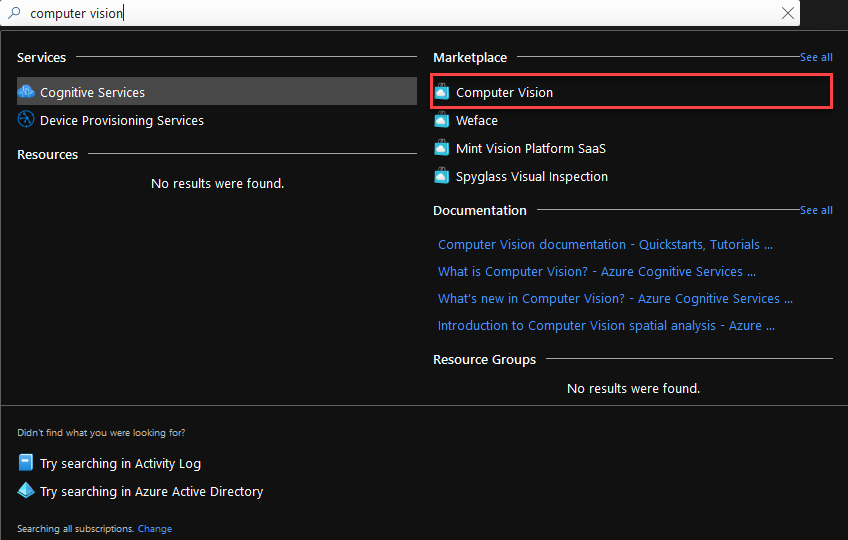
Go to Azure Portal and search for Computer Vision. Select Computer Vision from the Marketplace.
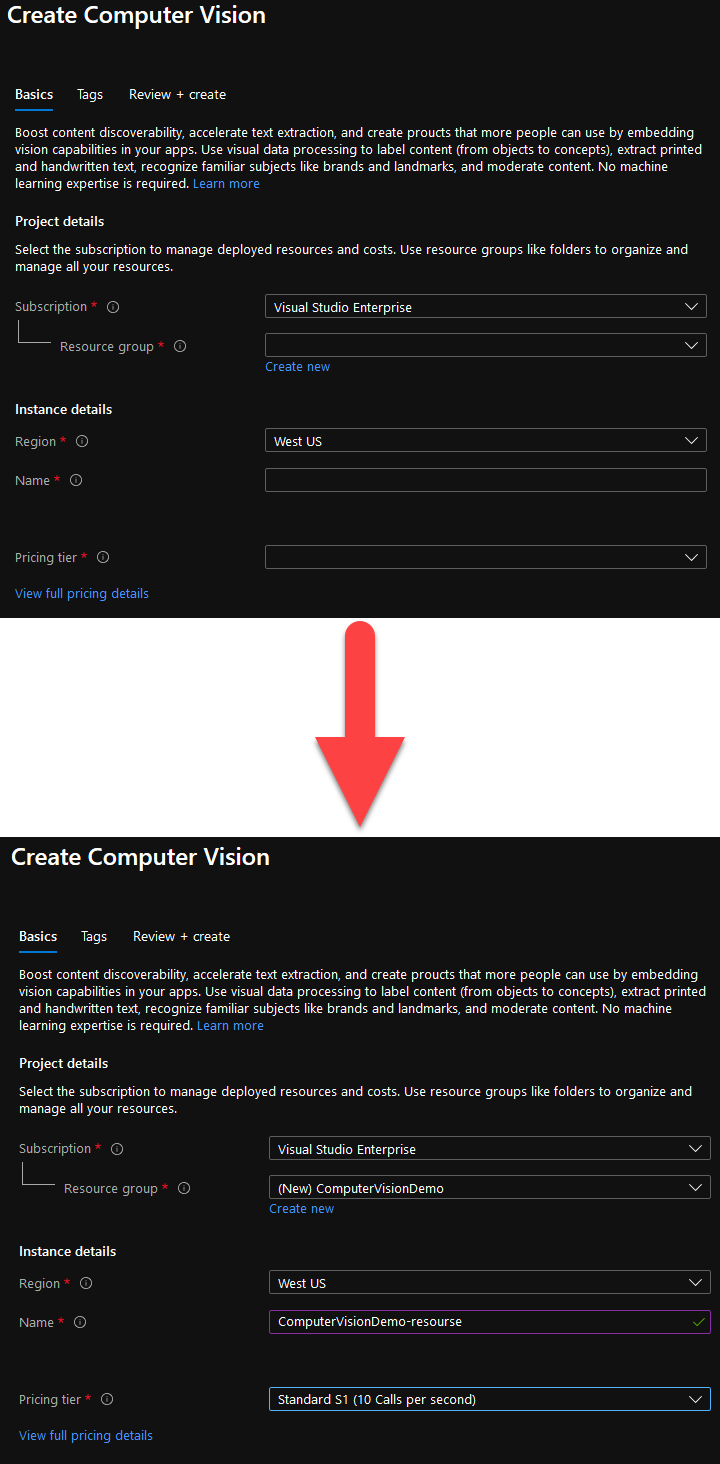
Fill the form. The fields with the ‘*’ are mandatory.
- Subscription should already be filled in with your default subscription.
- For Resource Group, you can use an existing one, or create a new one.
- You can leave Region with the pre-selected region.
- Name is the name of your new Computer Vision resource.
- Any Pricing tier will do for this demo.
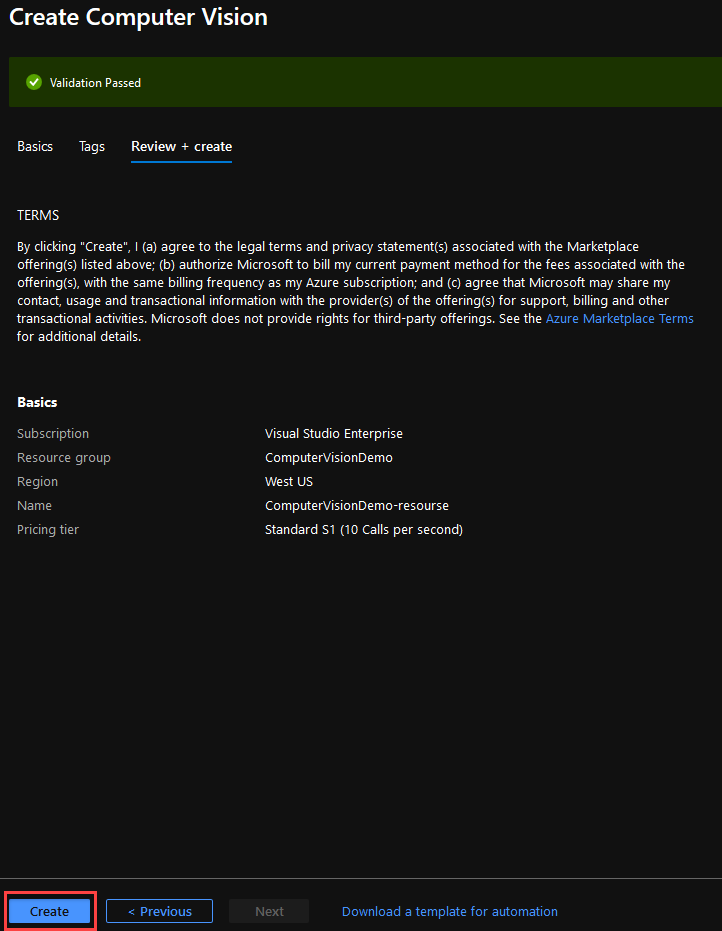
Continue to the last step and click Create.
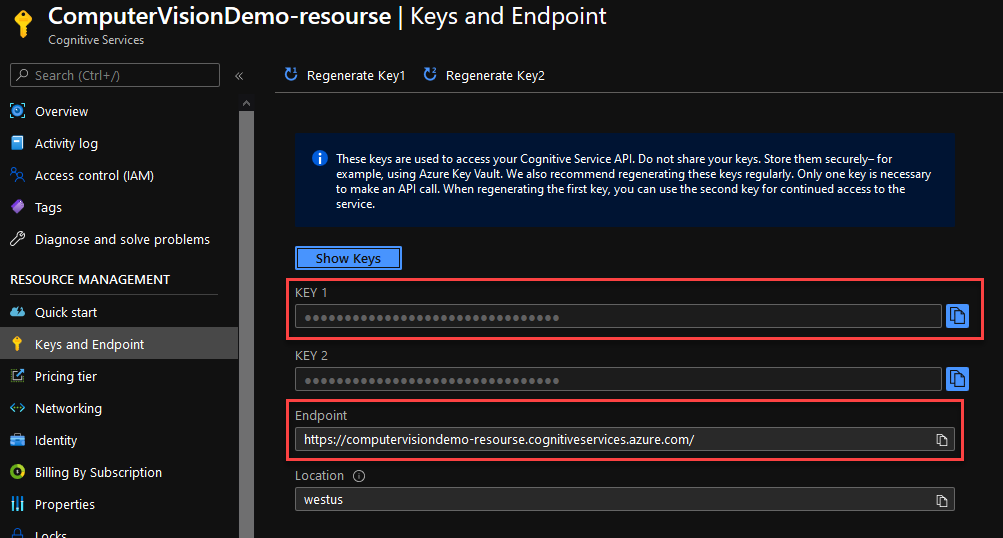
Go to your resource and navigate to the Keys and Endpoint tab at the left of your window.
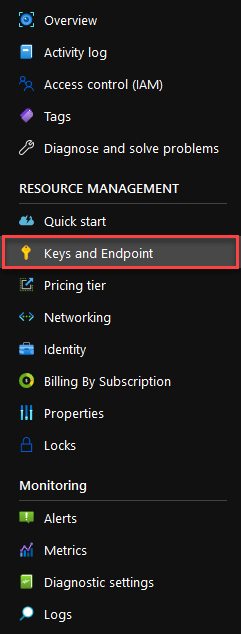
From here you can grab a Key and your Endpoint. You will need theese later.
Implement
Open your existing project in Visual Studio. If you are not working on an existing project, simply create a C# (.NET Core) Console app.
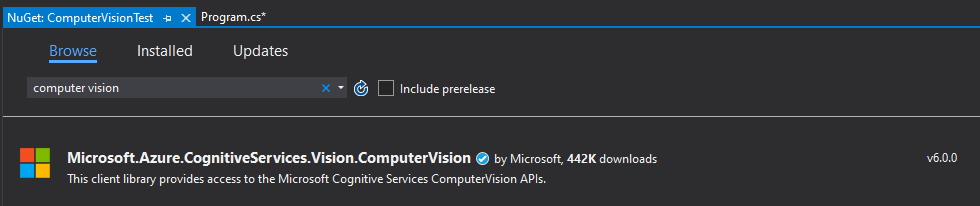
Navigate to Project -> Manage NuGet Packages, find and install the Microsoft.Azure.CognitiveServices.Vision.ComputerVision package.
Open the class that you need to implement the image analyser in. For a new project you can use the Program.cs.
Add the using statements you see below at the top of the file.
      using Microsoft.Azure.CognitiveServices.Vision.ComputerVision;
      using Microsoft.Azure.CognitiveServices.Vision.ComputerVision.Models;
      using System;
      using System.Collections.Generic;
      using System.Threading.Tasks;
Add these strings at the top of your class. The subscriptionKey should be the Key and endpoint is the Endpoint you found in the last step. At line 6 the ANALYZE_URL_IMAGE constant must be populated with the URL of the image you want to analyse. You can grab the URL of the images in the Test section of this post.
// Add your Computer Vision subscription key and endpoint
static string subscriptionKey = "b5c6KEY_HERE81400602c7";
static string endpoint = "https://computervisiondemo-resourse.cognitiveservices.azure.com/";

// URL image used for analyzing an image
private const string ANALYZE_URL_IMAGE = "";
Inside your Main put the code that appears below. Do not worry about the missing functions, we will create them in the next step.
// Create a client
ComputerVisionClient client = Authenticate(endpoint, subscriptionKey);

// Analyze an image to get features and other properties.
AnalyzeImageUrl(client, ANALYZE_URL_IMAGE).Wait();
Add the Authenticate function to create a connection between your project and your Copmuter Vision resource.
public static ComputerVisionClient Authenticate(string endpoint, string key)
{
    ComputerVisionClient client =
        new ComputerVisionClient(new ApiKeyServiceClientCredentials(key))
        { Endpoint = endpoint };
    return client;
}
The AnalyzeImageUrl is the function that analyses the image and outputs the results. In this example it will only output the summary of the image, however much more functionality is supported.
public static async Task AnalyzeImageUrl(ComputerVisionClient client, string imageUrl)
{
    // Creating a list that defines the features to be extracted from the image.
    List<VisualFeatureTypes?> features = new List<VisualFeatureTypes?>()
    {
        VisualFeatureTypes.Categories, VisualFeatureTypes.Description,
        VisualFeatureTypes.Faces, VisualFeatureTypes.ImageType,
        VisualFeatureTypes.Tags, VisualFeatureTypes.Adult,
        VisualFeatureTypes.Color, VisualFeatureTypes.Brands,
        VisualFeatureTypes.Objects
    };

    // Analyze the URL image
    ImageAnalysis results = await client.AnalyzeImageAsync(ANALYZE_URL_IMAGE, features);

    // Summarizes the image content.
    Console.WriteLine("Summary:");
    foreach (var caption in results.Description.Captions)
    {
        Console.WriteLine($"{caption.Text} with confidence {caption.Confidence}");
    }
    Console.WriteLine();
}
If you wish to add extra functionality to your image analyser you can add code segments into the AnalyzeImageUrl function from here. You can also take a look here to see more examples of what is supported with the Computer Vision service.
Test
To test, simply put the URL of one of the images below to the ANALYZE_URL_IMAGE constant and run the project.
Example 1


Example 2


As you can see it works pretty well! And this is how you can utilise the power of Computer Vision to make an image analyser! It is also extremely easy to give this functionality to a bot, let the user show photos to the bot and receive information about them.