Get familiar with Azure Translator
Translator in Azure is an AI service, part of cognitive services, used for real-time text translation and detection. It is fast and easy to implement, to bring intelligence to your text processing projects.
Create
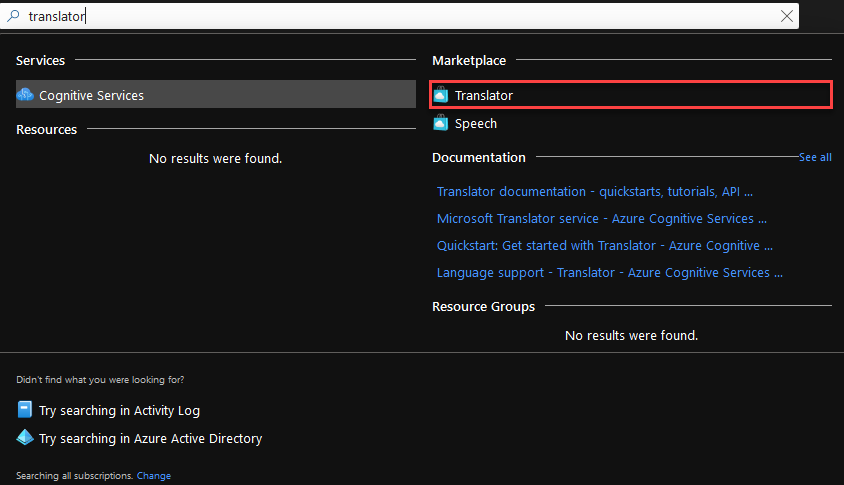
To create a translator resource go to Azure Portal and search for translator. Select Translator from the Marketplace.
Fill the form. The fields with the ‘*’ are mandatory.
- Subscription should already be filled in with your default subscription.
- For Resource Group, you can use an existing one, or create a new one.
- Choose Region your preferred region.
- Name is the name of your new Translator resource.
- Any Pricing tier will do for this demo.
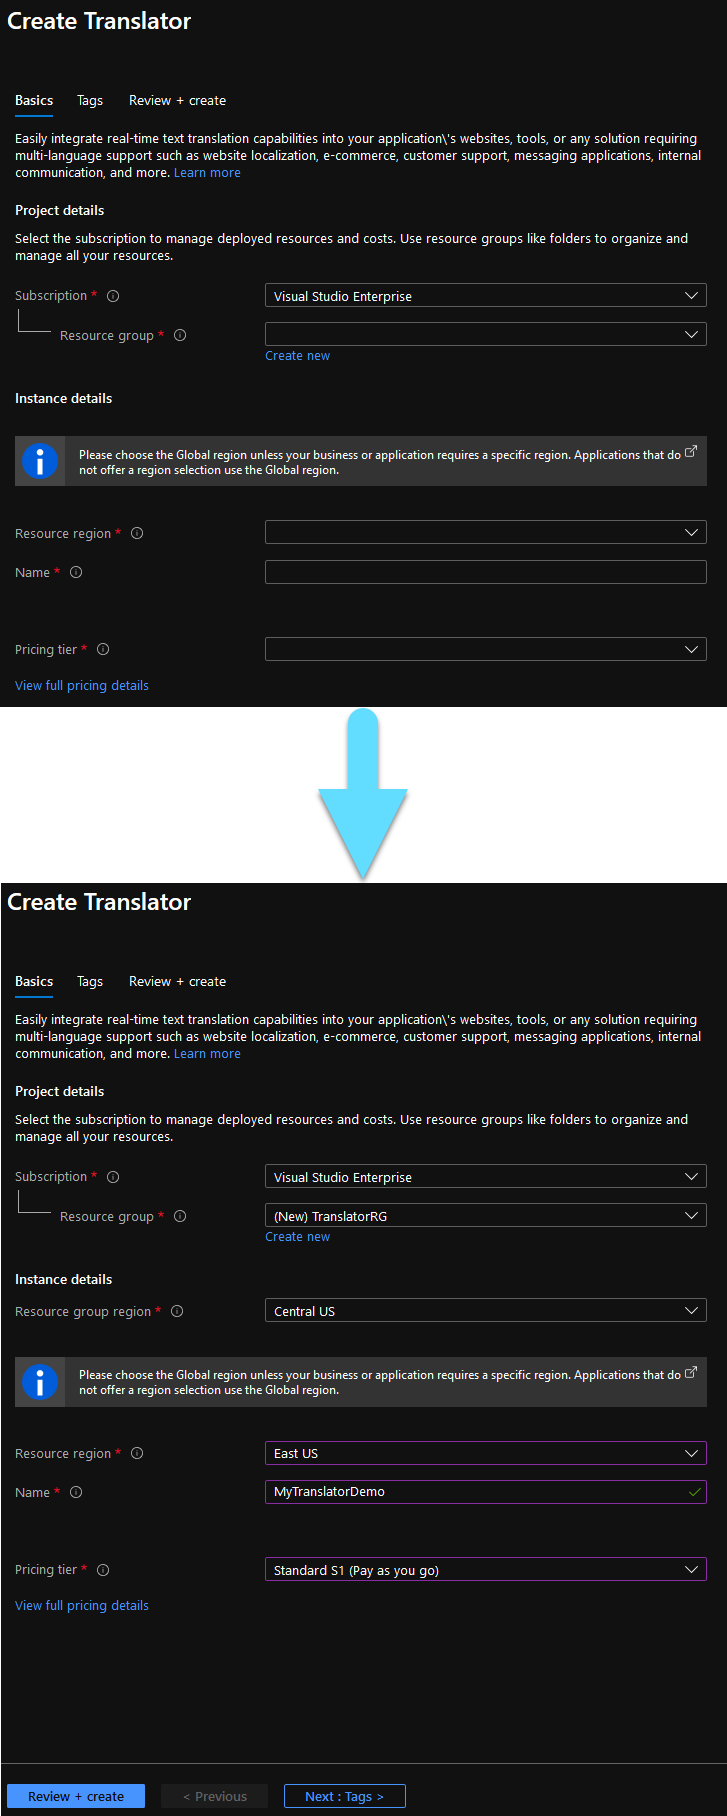
Click Review + Create at the bottom of the page and wait for your resource to deploy.
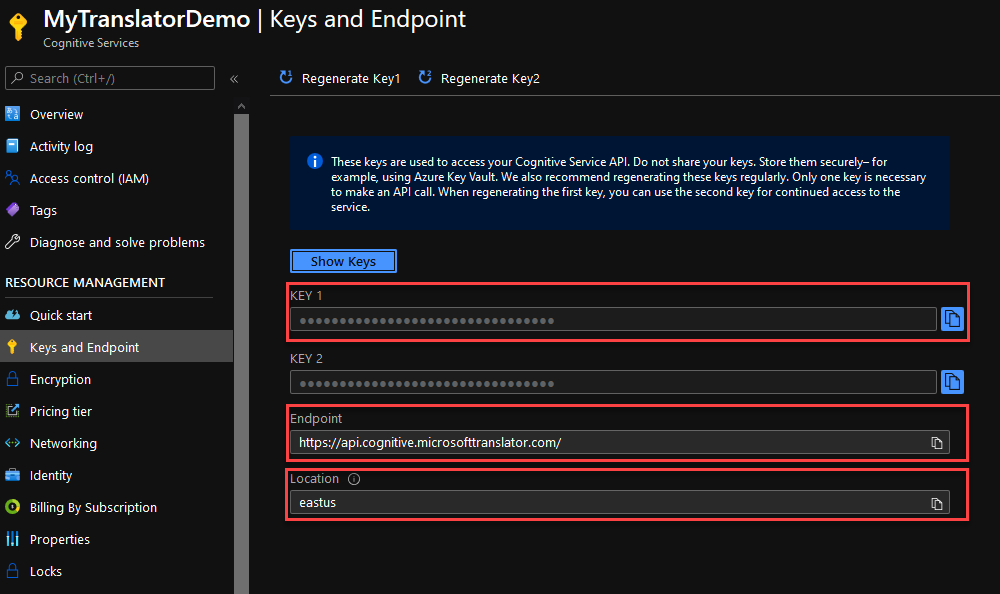
Go to your resource and navigate to the Keys and Endpoint tab at the left of your window. From here you can grab a Key, your Endpoint and your Location. You will need theese later.
Implement
Open your existing project in Visual Studio. If you are not working on an existing project, simply create a C# (.NET Core) Console app.
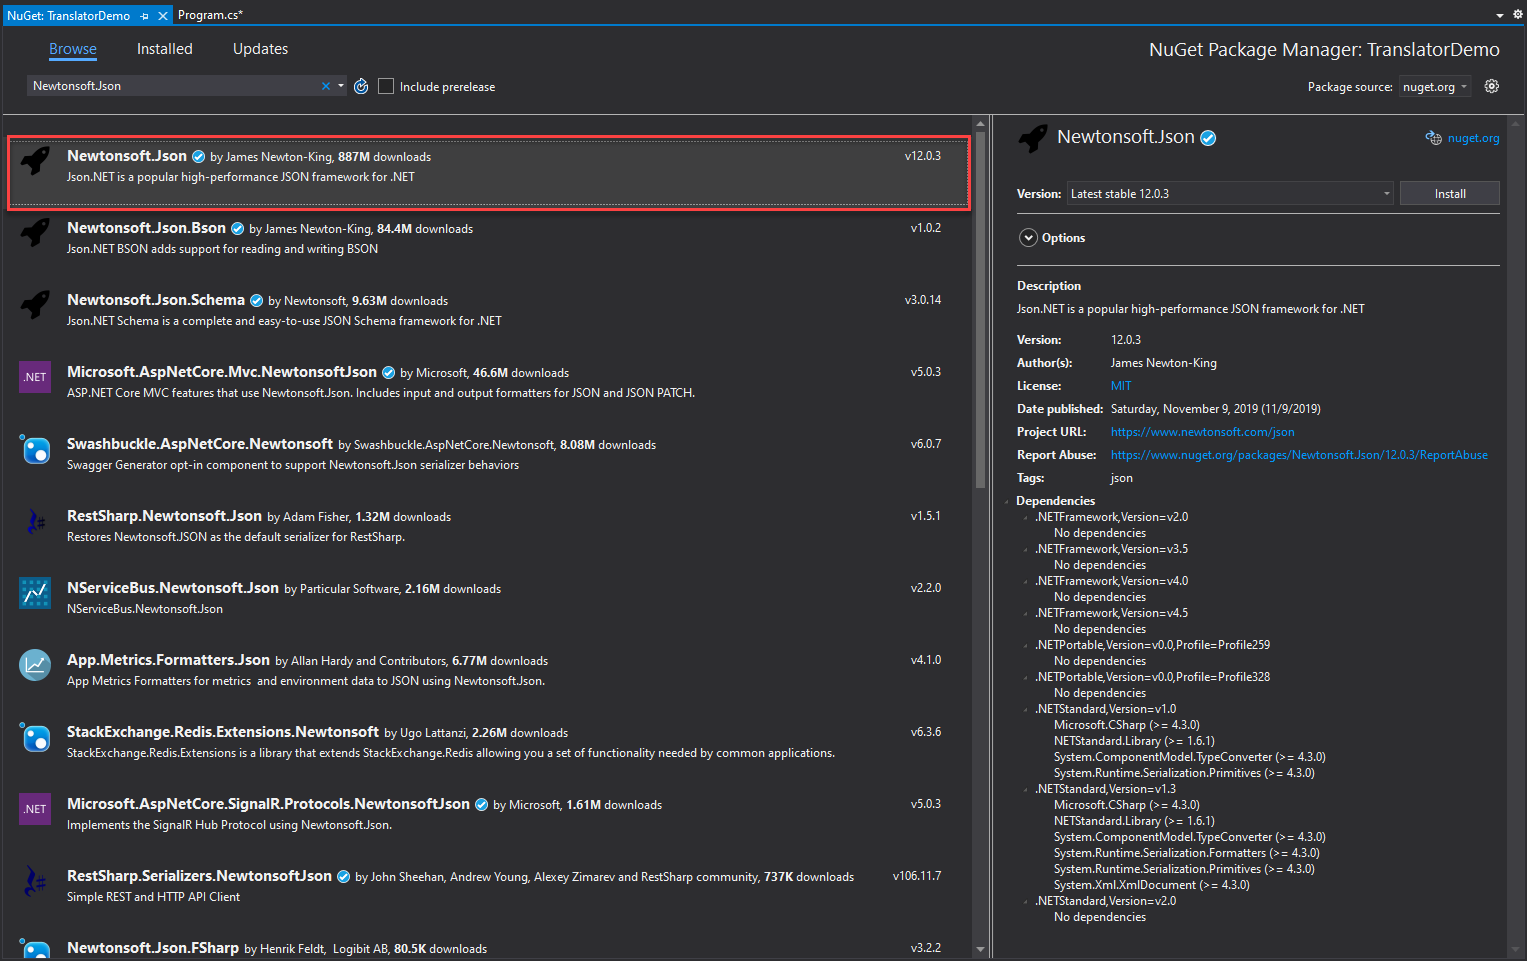
Navigate to Project -> Manage NuGet Packages, find and install the Newtonsoft.Json package.
Open the class that you need to implement the translator in. For a new project you can use the Program.cs.
Add the using statements you see below at the top of the file.
      using System.Collections.Generic;
      using System.Linq;
      using System.Net.Http;
      using System.Text;
      using System.Threading.Tasks;
      using Newtonsoft.Json;
Add your resource data at the top of your class. For the string in subscriptionKey you can use one of the keys you got before, the endpoint for the string in endpoint and the location for your location at line 3.
private static readonly string subscriptionKey = "73e0c30084KEY_HEREd94ae362b47";
private static readonly string endpoint = "https://api.cognitive.microsofttranslator.com/";
private static readonly string location = "eastus";
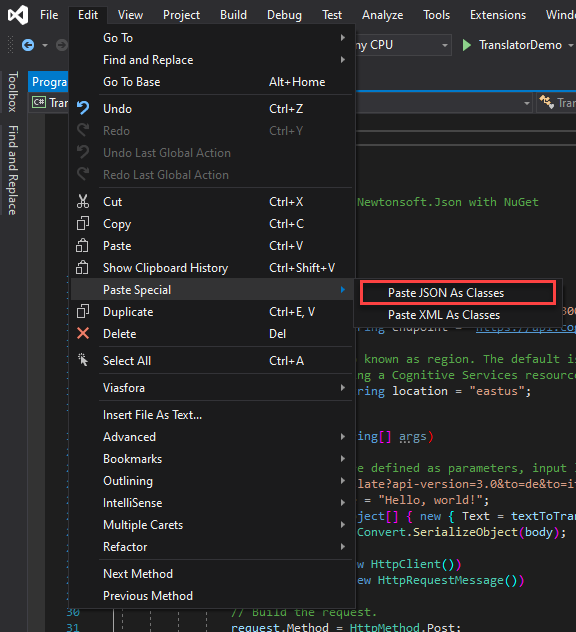
Now we need to create the classes that will contain our deserialized json. You can do that in Visual Studio by pasting the following json As JSON Classes. Go to Edit->Paste Special->Paste JSON As Classes. However, following this you might need to do some modifications in order to work, so I attached the resulting classes below to import directly in your project!
Here is the json you could copy.
[
    {
        "detectedLanguage": {
            "language": "en",
            "score": 1.0
        },
        "translations": [
            {
                "text": "Hallo Welt!",
                "to": "de"
            },
            {
                "text": "Salve, mondo!",
                "to": "it"
            }
        ]
    }
]
And that is how you paste it.
If you skipped the last step, copy the following classes in your project. You can put them either in a separate file, or in Program.cs directly below Main.
public class Rootobject
{
    public Detectedlanguage detectedLanguage { get; set; }
    public List<Translation> translations { get; set; }
}

public class Detectedlanguage
{
    public string language { get; set; }
    public float score { get; set; }
}

public class Translation
{
    public string text { get; set; }
    public string to { get; set; }
}
Here is the code that does all the magic! Inside your Main paste the following code. In string route at line 2 you can put all the languages you wish to translate your text to. Simply write &to= and then attach the Language code. You can find all available language codes here. For now, we will translate the text to German and Italian.
The textToTranslate string at line 3 is the text you wish to translate. The service will automatically detect which language is written at before translating it. So you can try inputing text in languages other than English if you so desire.
From lines 22 - 32 is where we deserialize the json, we also use a try statement to catch any errors that might appear.
// Output languages are defined as parameters, input language detected.
string route = "/translate?api-version=3.0&to=de&to=it";
string textToTranslate = "Hello, world!";
object[] body = new object[] { new { Text = textToTranslate } };
var requestBody = JsonConvert.SerializeObject(body);

using (var client = new HttpClient())
using (var request = new HttpRequestMessage())
{
    // Build the request.
    request.Method = HttpMethod.Post;
    request.RequestUri = new Uri(endpoint + route);
    request.Content = new StringContent(requestBody, Encoding.UTF8, "application/json");
    request.Headers.Add("Ocp-Apim-Subscription-Key", subscriptionKey);
    request.Headers.Add("Ocp-Apim-Subscription-Region", location);

    // Send the request and get response.
    HttpResponseMessage response = await client.SendAsync(request).ConfigureAwait(false);
    // Read response as a string.
    string resultJson = await response.Content.ReadAsStringAsync();

    try
    {
        List<Rootobject> output = JsonConvert.DeserializeObject<List<Rootobject>>(resultJson);
        Console.WriteLine($"Input Text: {textToTranslate}\nPredicted Language: {output.FirstOrDefault().detectedLanguage.language}\nPredicted Score: {output.FirstOrDefault().detectedLanguage.score}\n\n");
        foreach (Translation obj in output.FirstOrDefault().translations)
            Console.WriteLine($"Translated Language: {obj.to}\nResult: {obj.text}\n\n");
    }
    catch(Exception e)
    {
        Console.WriteLine(e);
    }
}
If you want to experiment more with text translator try some of the code segments from here.
Test
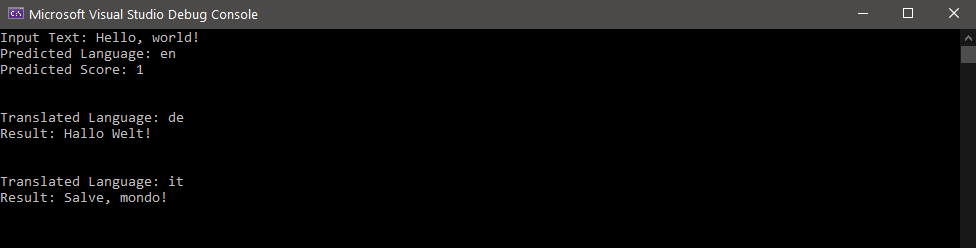
Now simply run the program to see how well the translator works. You can try changing the input text to test it. Here is the output of the text we had above.
Now you have a ready to go translator for your next project!