Create new dialogs with Bot Framework Composer
 July 22, 2021
Here you can find how to create your own custom dialogs using Bot Framework Composer.
Dialogs provide a way to manage a long-running conversation with the user. A dialog performs a task that can represent part of or a complete conversational thread. It can span just one turn or many, and can span a short or long period of time.
Create
Open up Bot Framework Composer and create an Empty Bot.
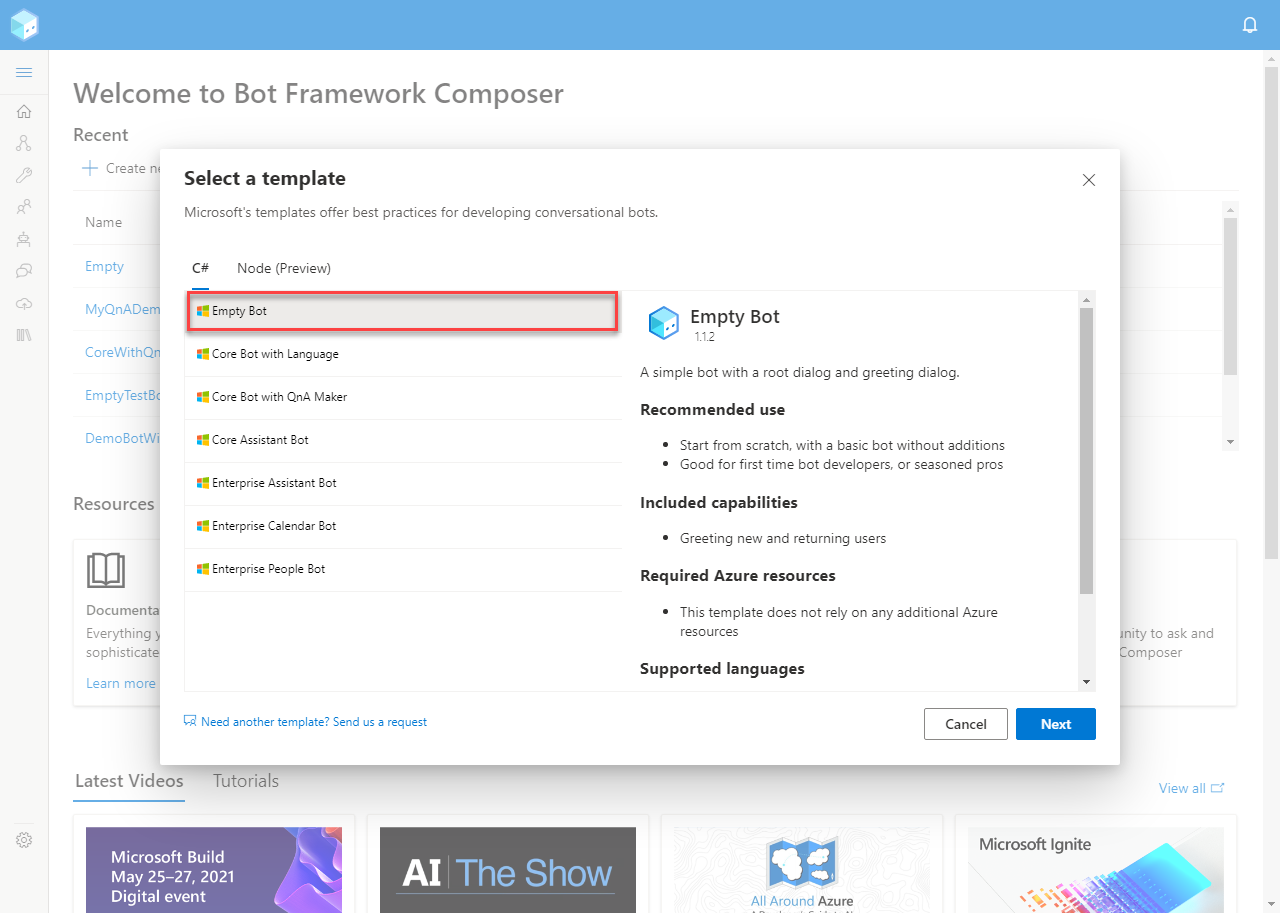
Give a name to your bot and click Next.

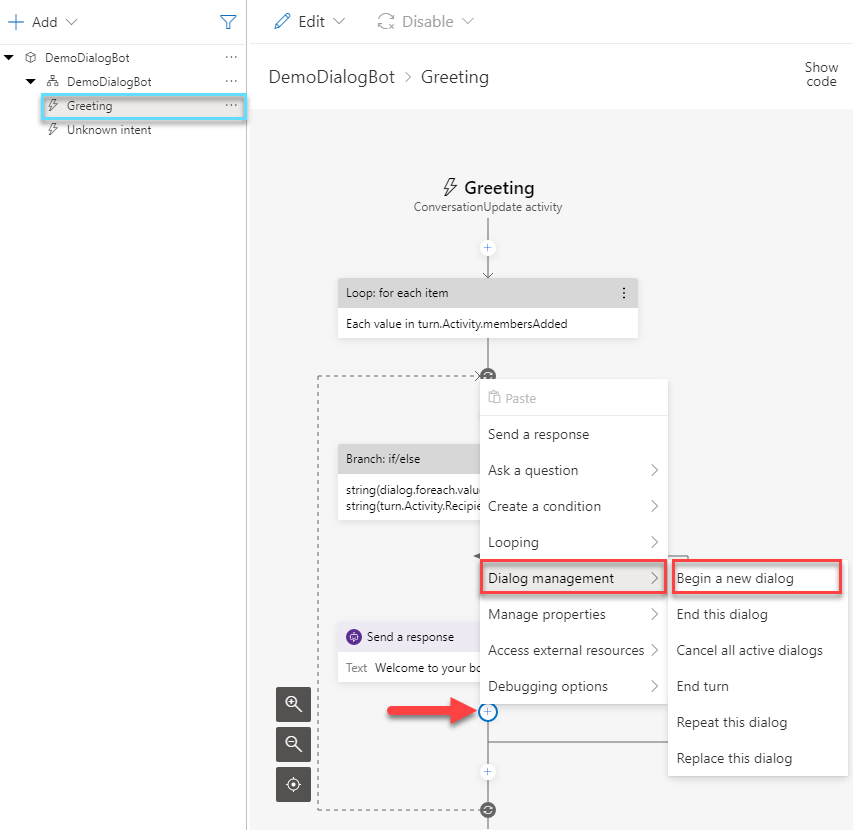
In the Greeting trigger click on the little “+” sign bellow the last response. Then, choose the Begin a new dialog option from Dialog management.
Press the arrow in the Dialog name field and click Create new dialog.
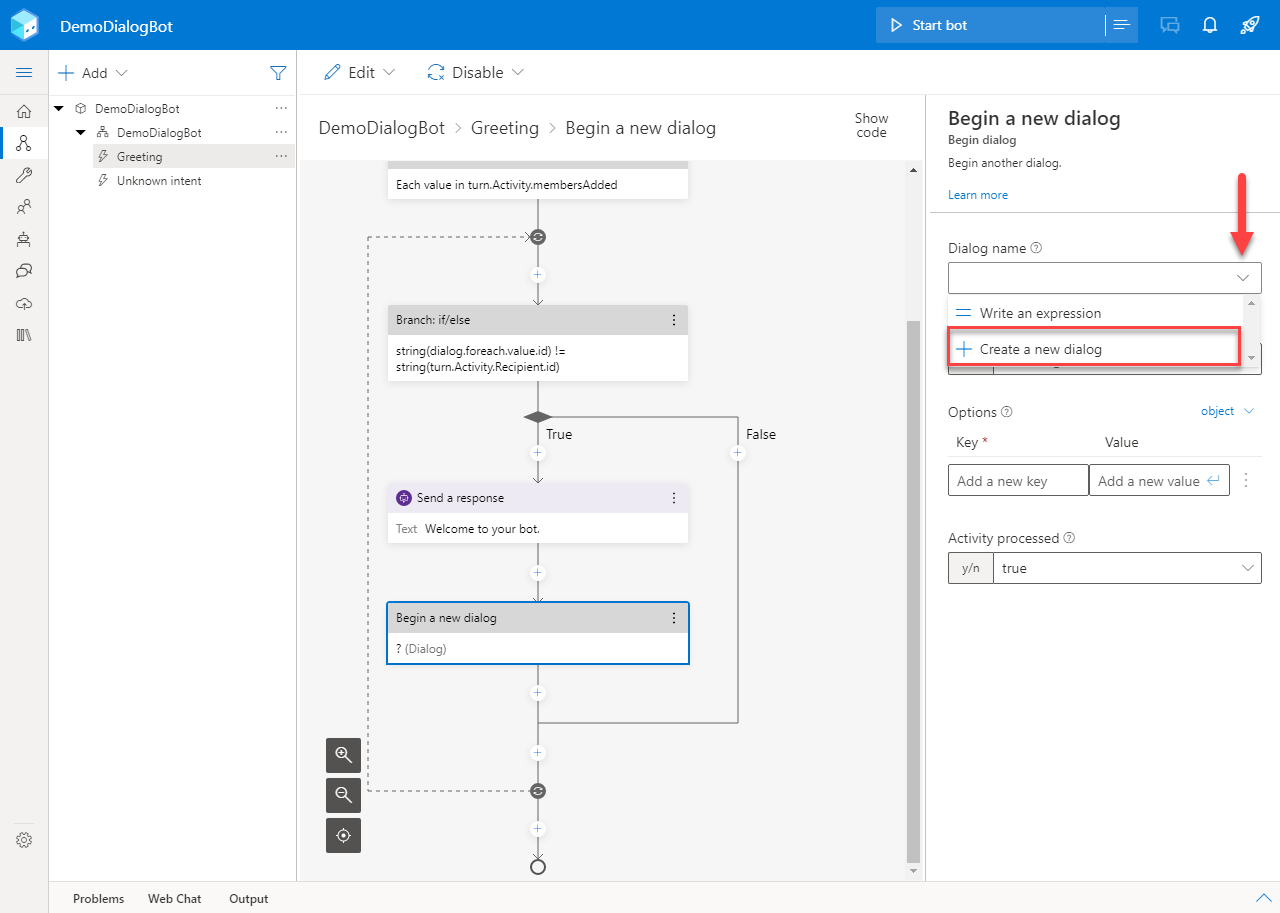
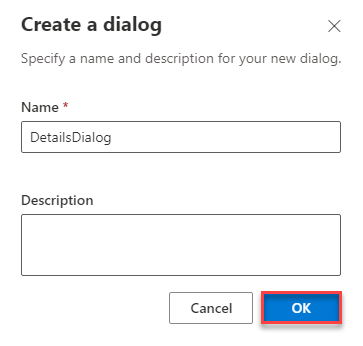
Give a name to your dialog and click OK.
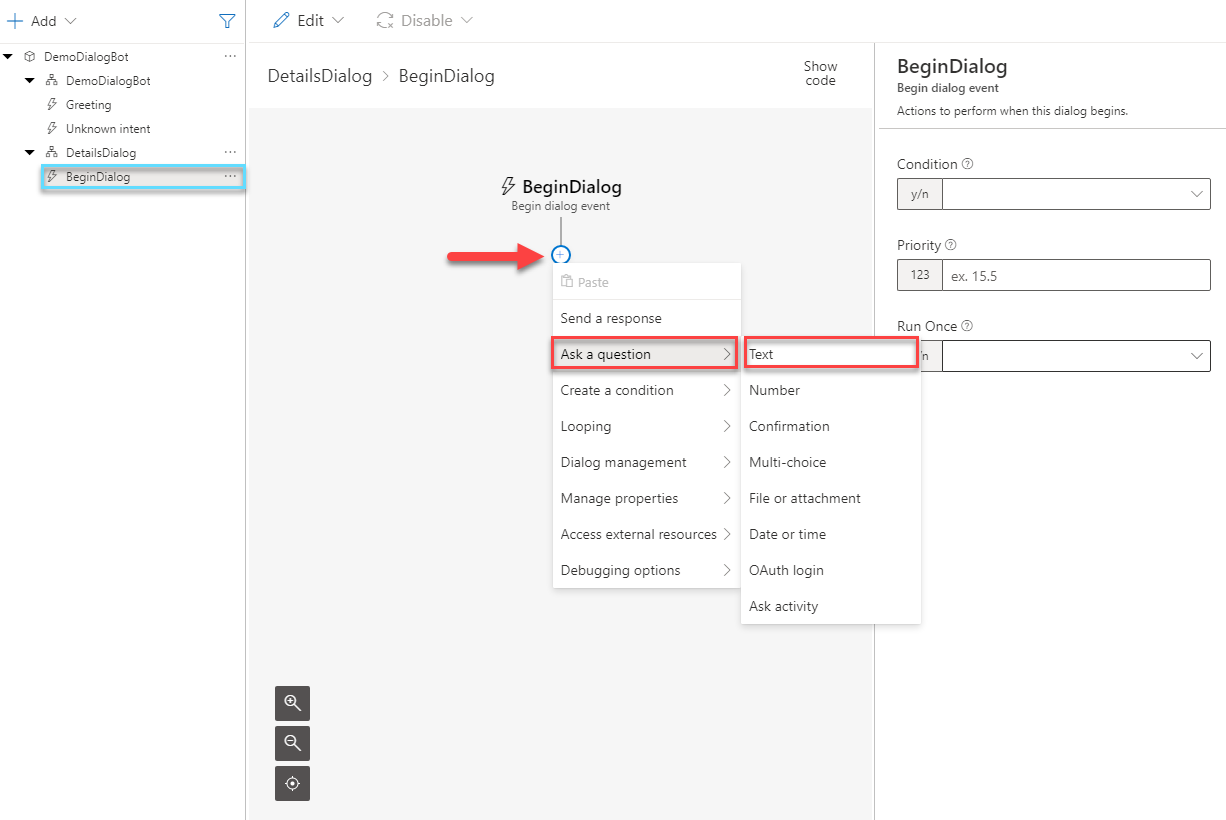
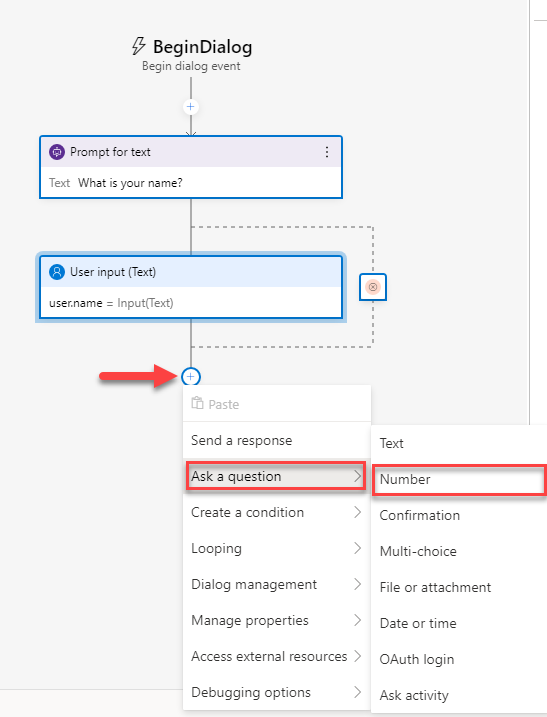
In your new dialog, navigate to the new trigger. Press the “+” sign and select Text from the Ask a question list.
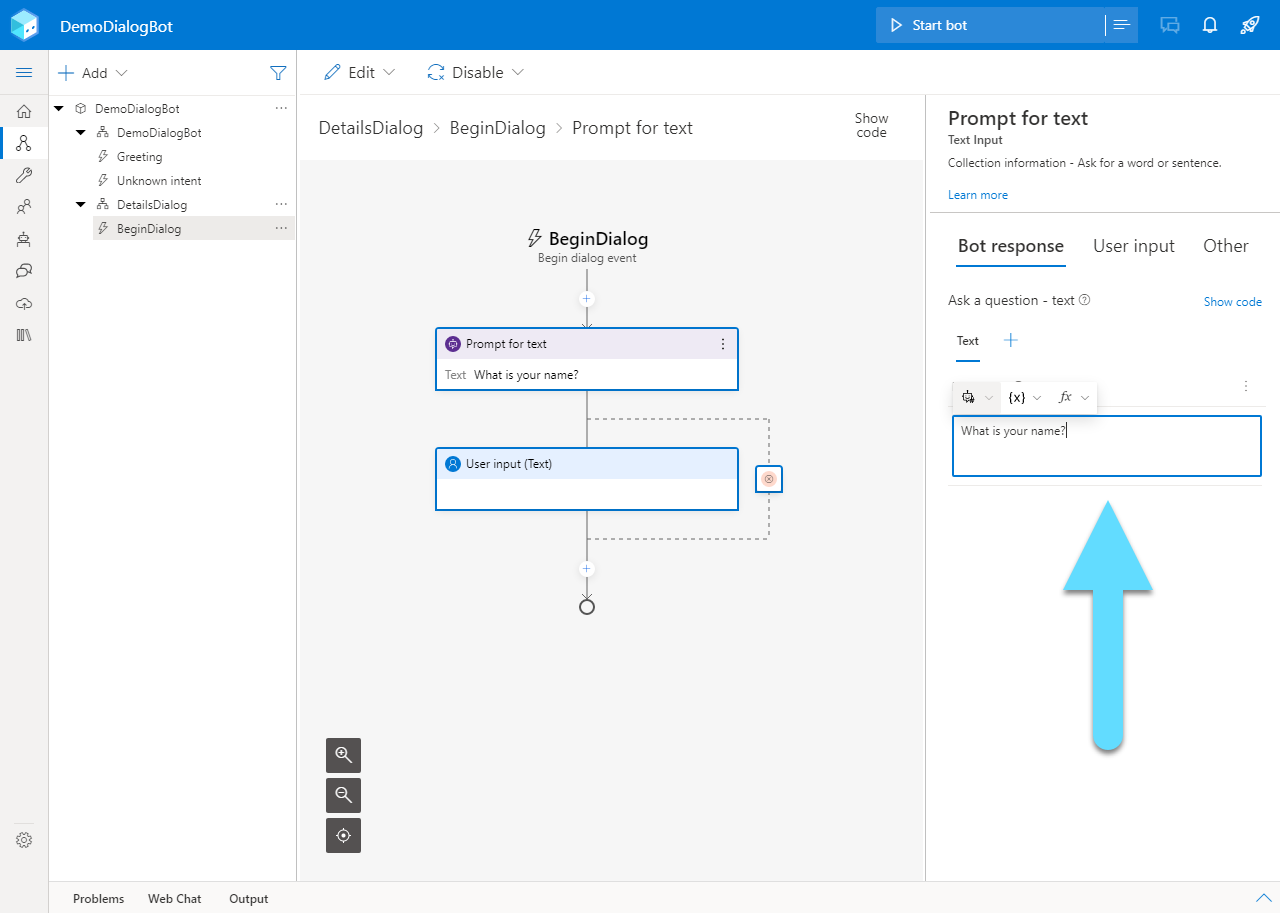
Here you can enter the contents of your new question.
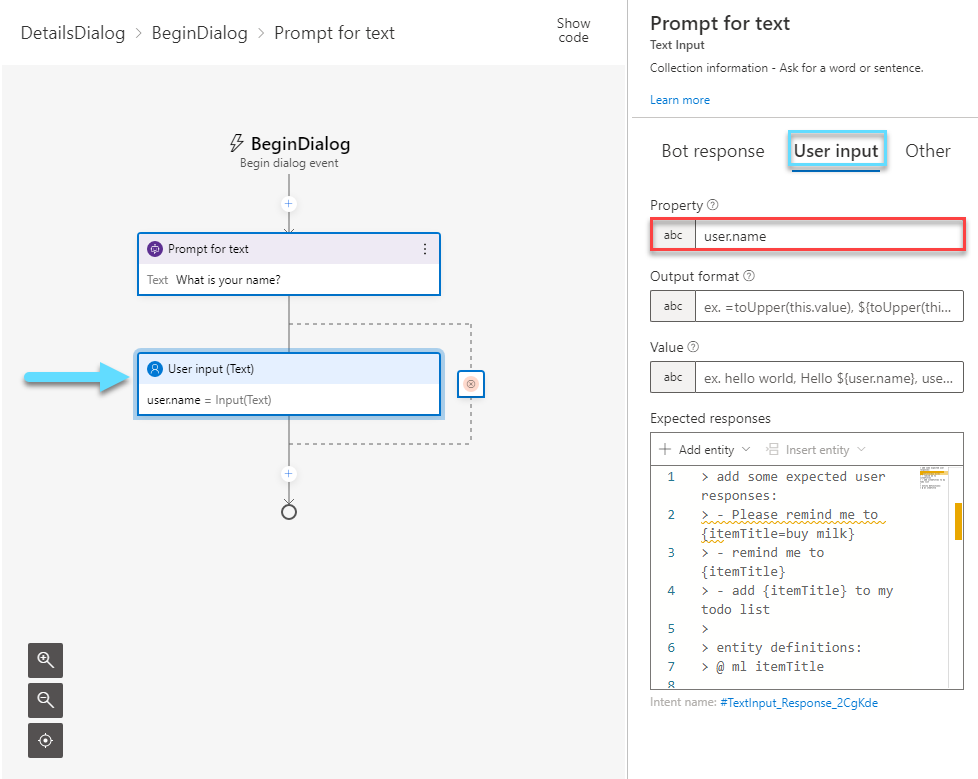
In the Property field of the new User Input, put the name of the variable that stores the user’s answer. For example “user.name”.
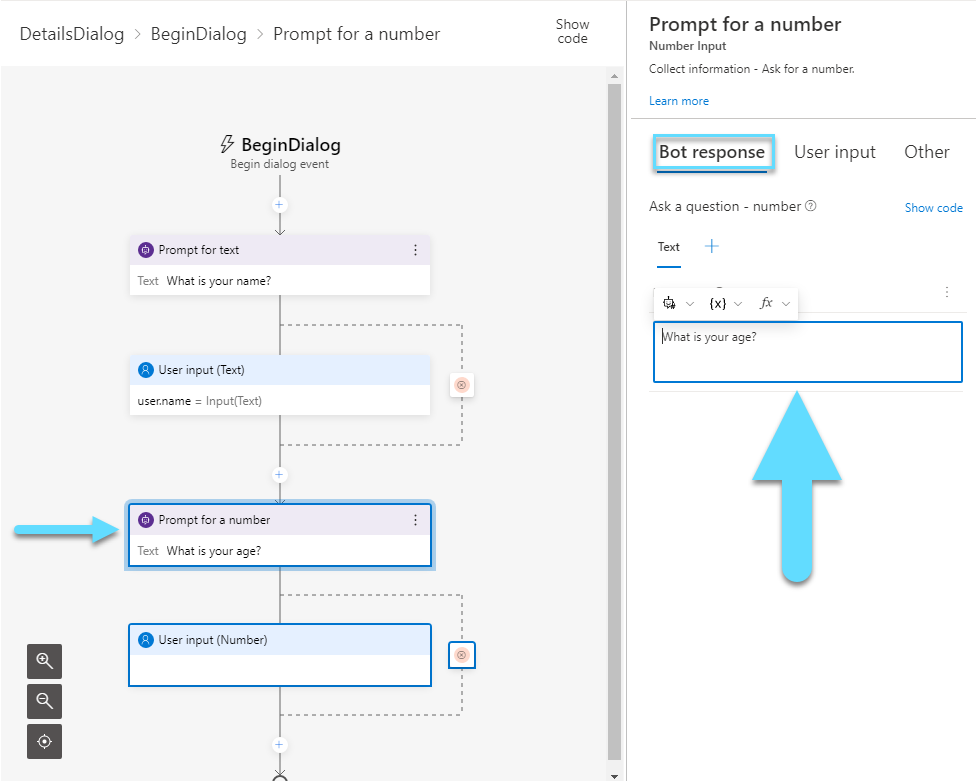
Continue with asking a Number question.
Enter a question that can be answered with a number.
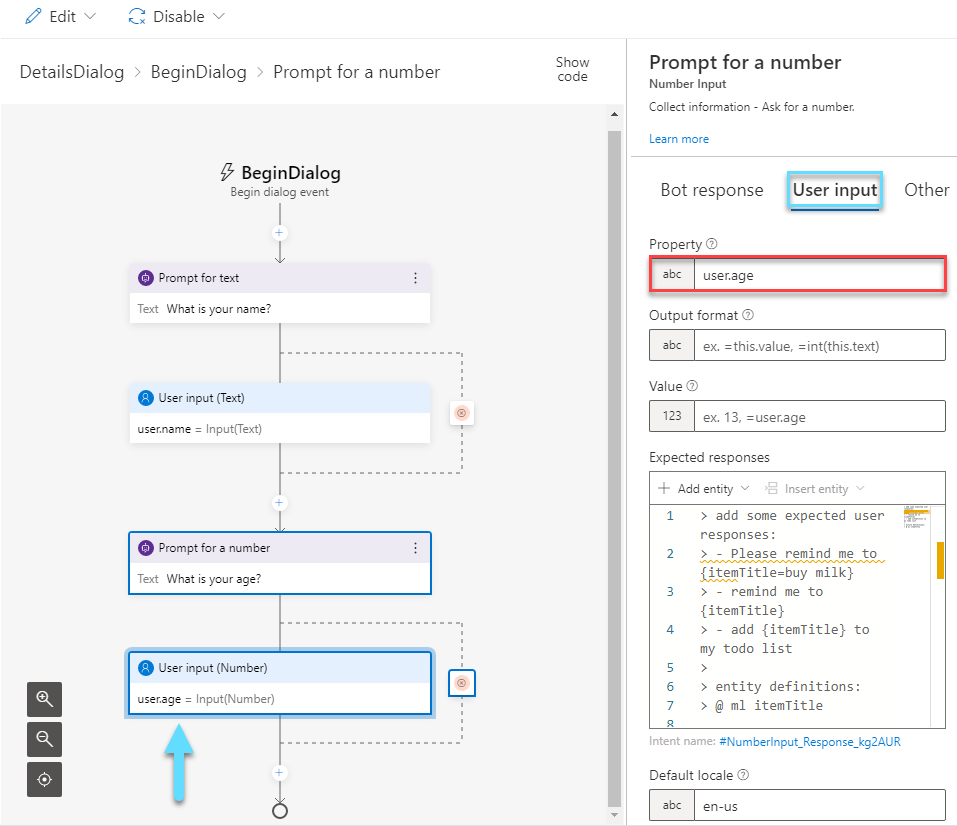
In the Property field of User input, you have to give a name to the variable again. For example “user.age”
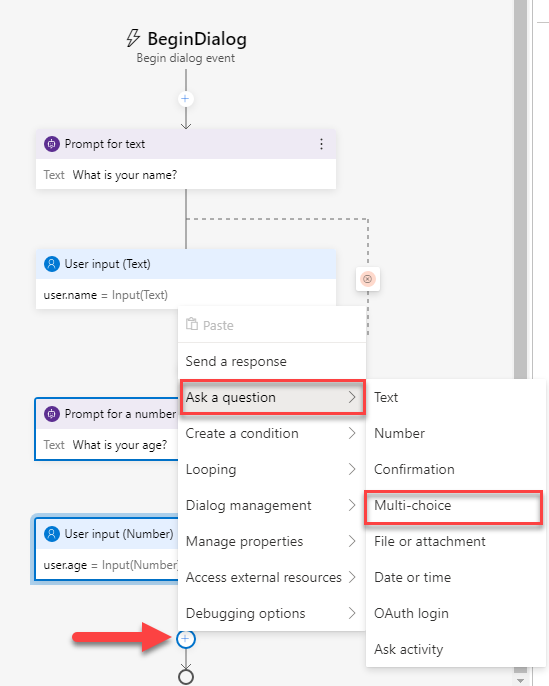
Now add a Multi-choice question.
Enter the text for your question.
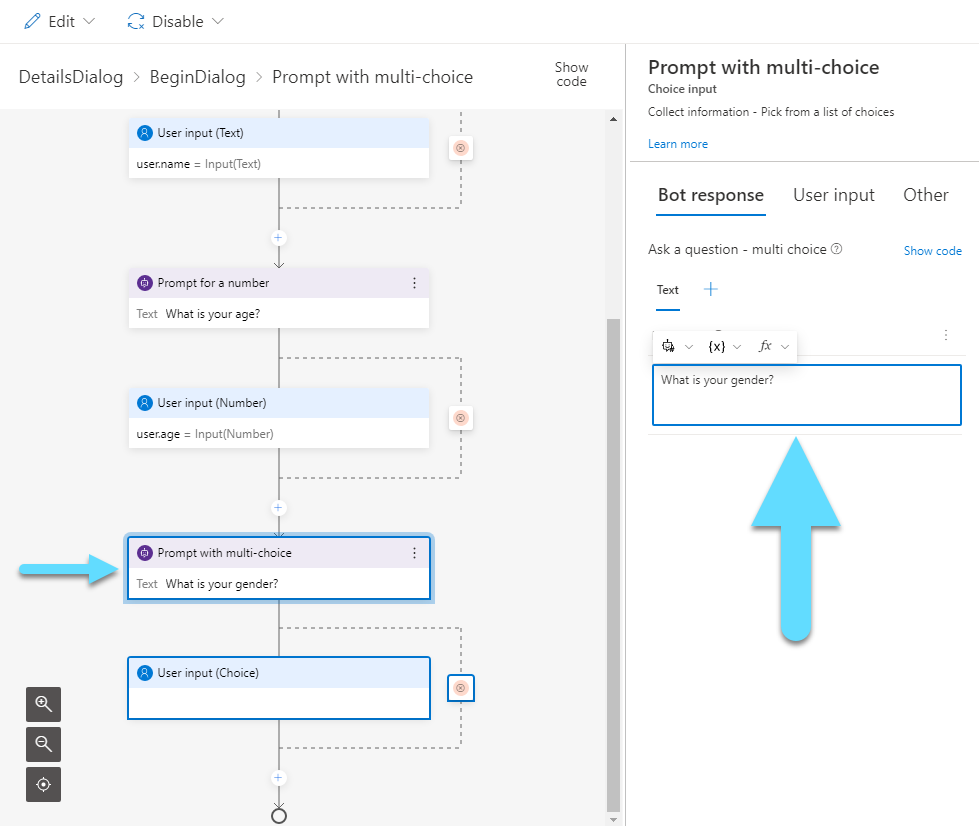
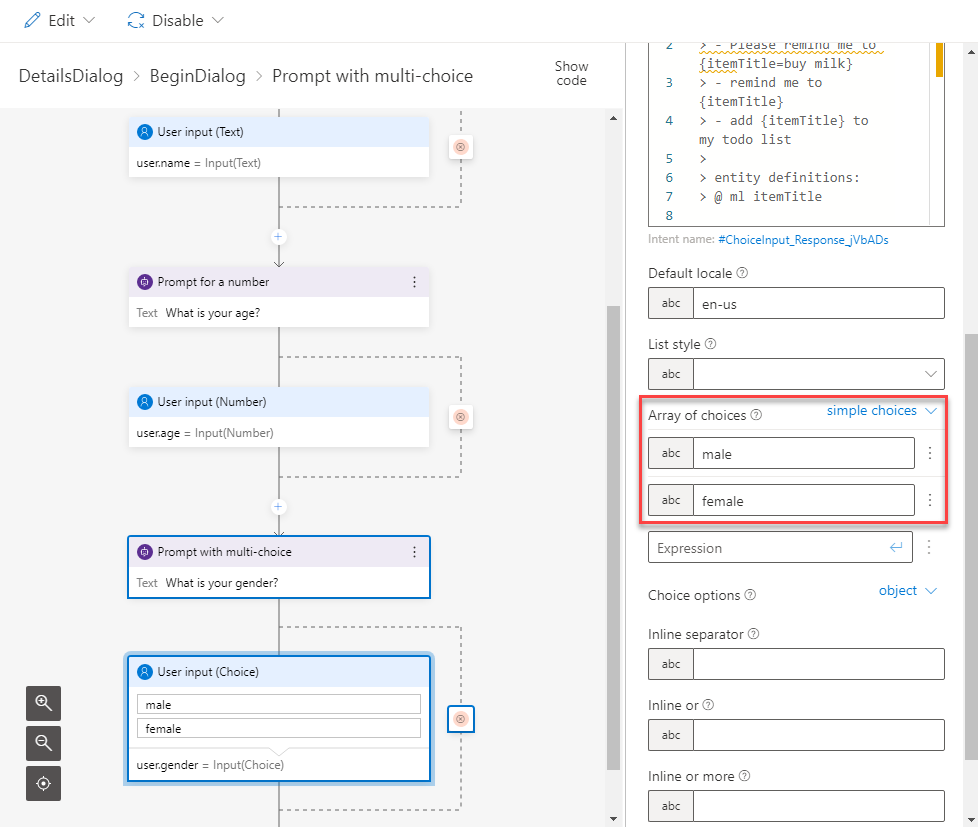
And again, enter the variable name in the Property field of User input, like “user.gender”.

If you scroll down, you will find an Array of choices. Here you can add all the choices that will be available to the user as answers.
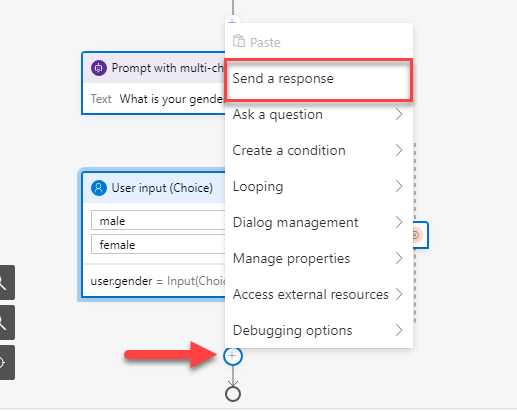
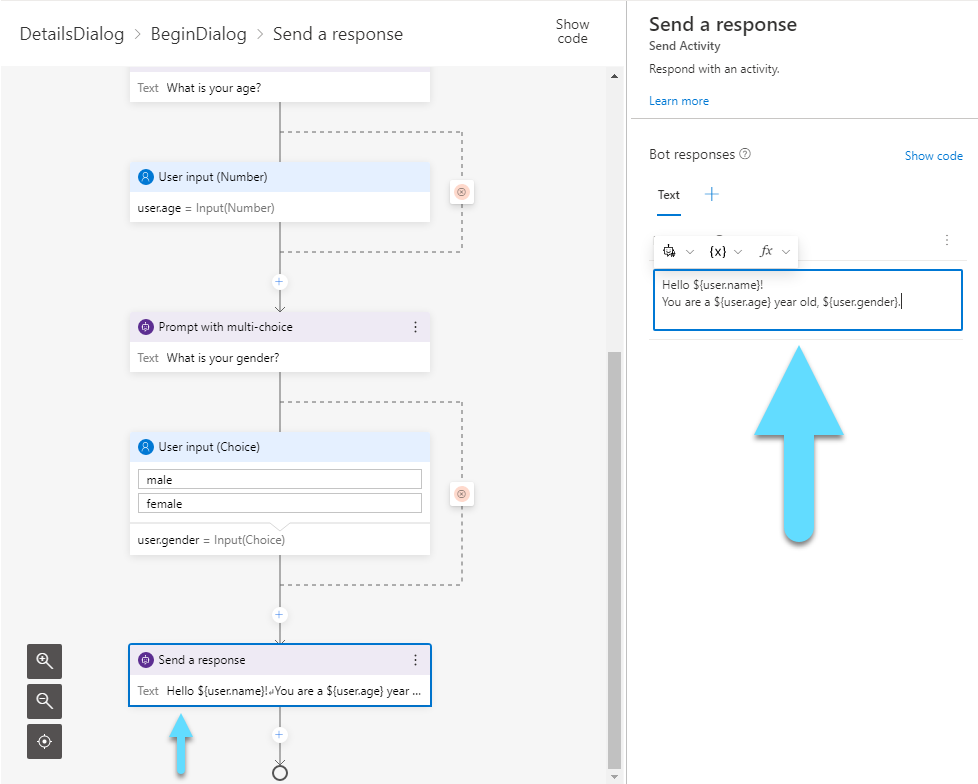
Now, let’s send a message to the user with all the info we gathered. Click the “+” and select Send a response.
You can find all of your variables under the {x} list.
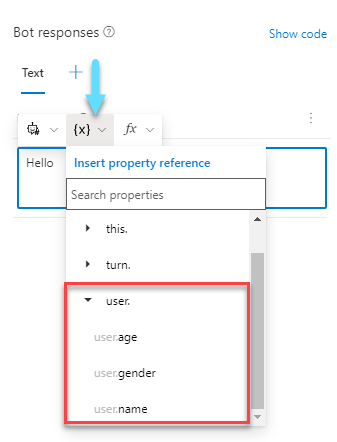
Use the variables above to compose your message.
Adaptive Card
Another way of presenting information to the user, is with Adaptive Cards. They look more appealing to the user and provide a better user experience. If you want to learn more about Adaptive Cards, check out this post.
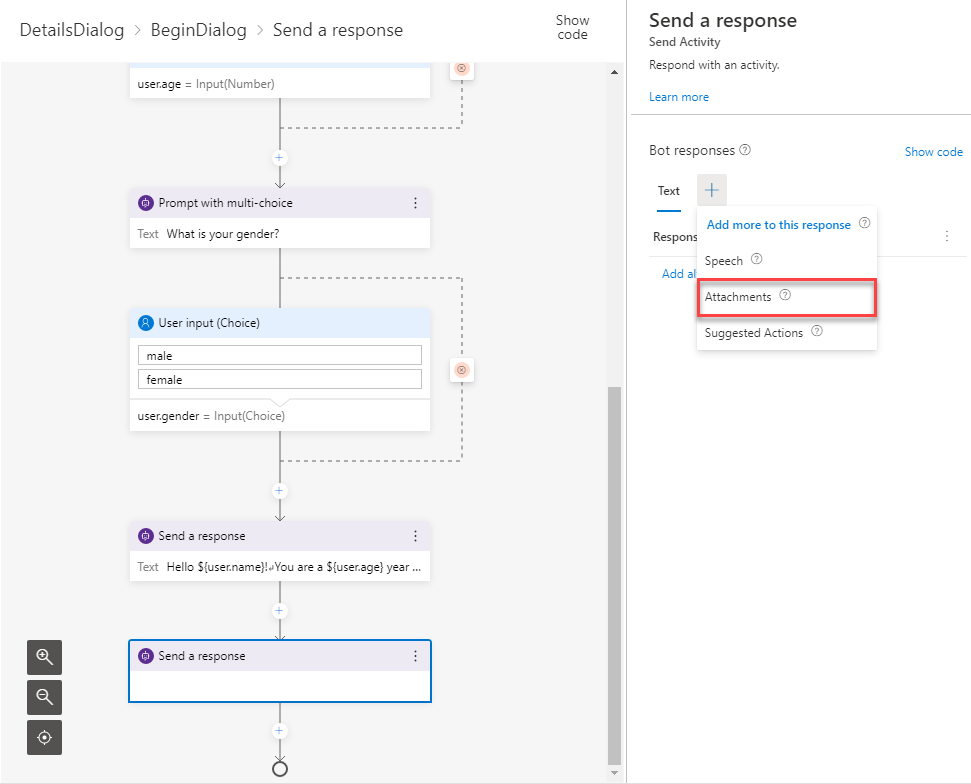
After you select a new response, click on the big “+” sign at Bot responses. From there select Attachments.
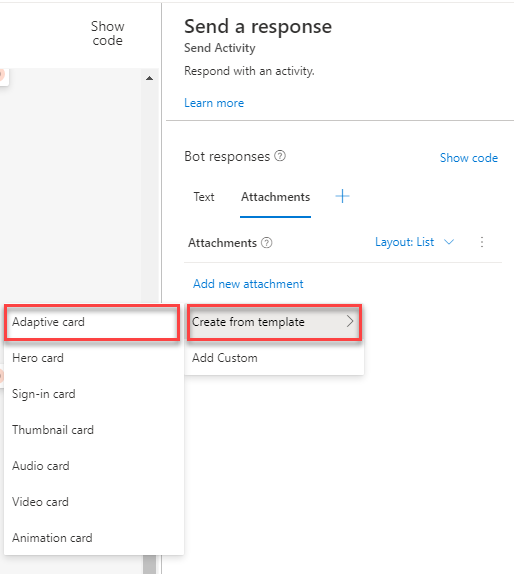
Select Add new attachment -> Create form template -> Adaptive card.
Click the icon at your right to enlarge the code box.
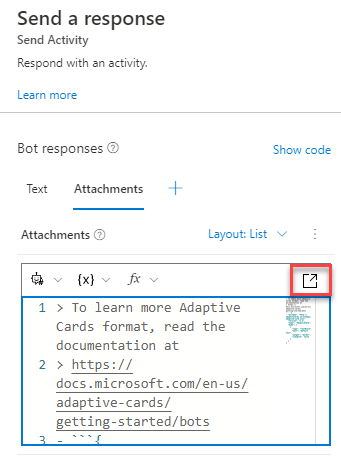
Relpace your card’s body with the JSON bellow.
"body": [
    {
      "type": "TextBlock",
      "text": "Name",
      "weight": "bolder",
      "isSubtle": false
    },
    {
      "type": "TextBlock",
      "text": "${user.name}",
      "isSubtle": false
    },
        {
      "type": "TextBlock",
      "text": "Age",
      "weight": "bolder",
      "isSubtle": false
    },
    {
      "type": "TextBlock",
      "text": "${user.age}",
      "isSubtle": false
    },
        {
      "type": "TextBlock",
      "text": "Gender",
      "weight": "bolder",
      "isSubtle": false
    },
    {
      "type": "TextBlock",
      "text": "${user.gender}",
      "isSubtle": false
    }
  ]
Test
Now it is time to test our bot.
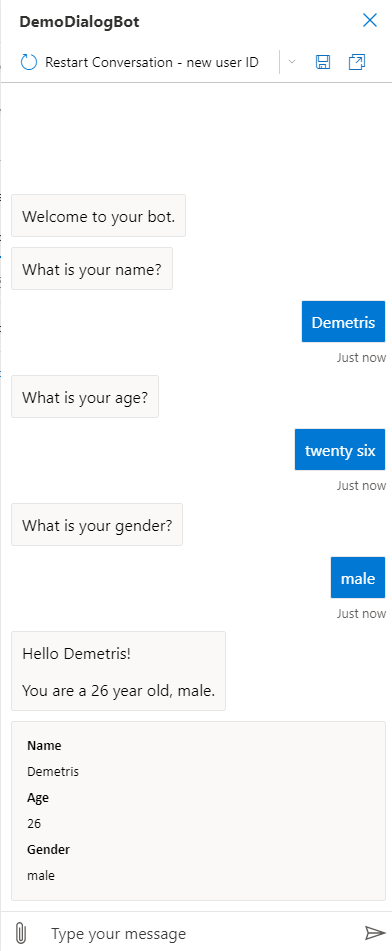
As you can see, our bot can hold the dialog pretty well and the card looks quite nice!